Access Amazon Machine Instances using PuTTy and Pageant


Introduction
There has been a lot of buzz about Virtual Machines hosted in the cloud using services such as Azure and Amazon Cloud services. Cloud Computing allows you to store resources and computing power without the requirement of actual physical devices for the user using it.
However, you might be wondering, if they are hosted in the cloud, how do I connect to these instances and use them? By the end of this article you will know how to connect to an AWS Machine Instance on a Windows Machine. Additionally, we will be using a .ppk private file during the connection.
What is an Amazon Machine Instance?
AMI is an instance that allows you to create a virtual machine within the the Amazon Elastic Compute Cloud.
What is a PuTTy?
PuTTy is a terminal emulator for Microsoft Windows, macOS, Linux that supports protocols such as SSH, telnet and more.
What is a .ppk file?
This is a file generated by PuTTygen. It allows you to generate keys for public key cryptography.
The Setup
For this tutorial, we will be using a PC running on windows and all installations will be done accordingly.
- Install PuTTy for Windows
- Download the .ppk private key file
The Pageant Steps
- Search for Pageant on your computer. It is installed along with PuTTy.
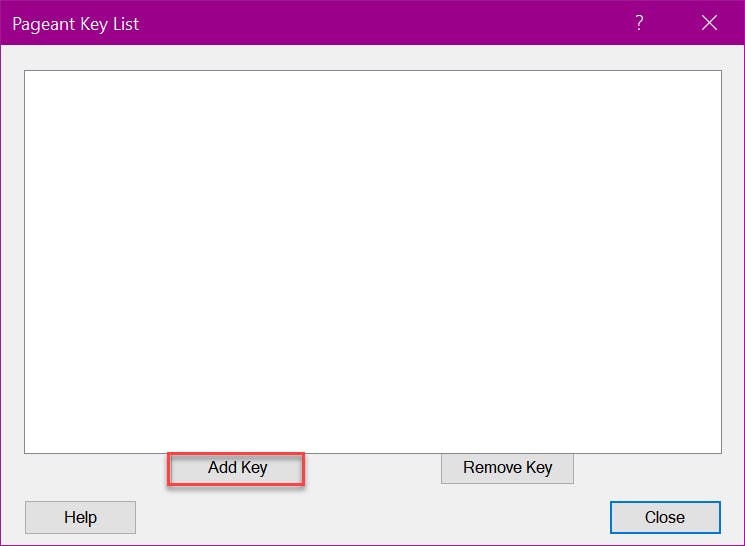
- Click on the Pageant software. This will launch it in the background, and you can see the icon in the taskbar tray
- Right click on the icon and select View Keys.
- Since we will be loading a .ppk file that we already have, select Add Key and browse and select the location of the key
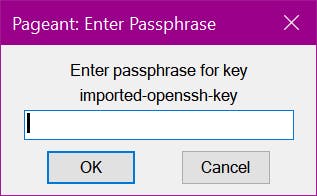
- If a PassPhrase is asked, enter the passphrase that was created by you.
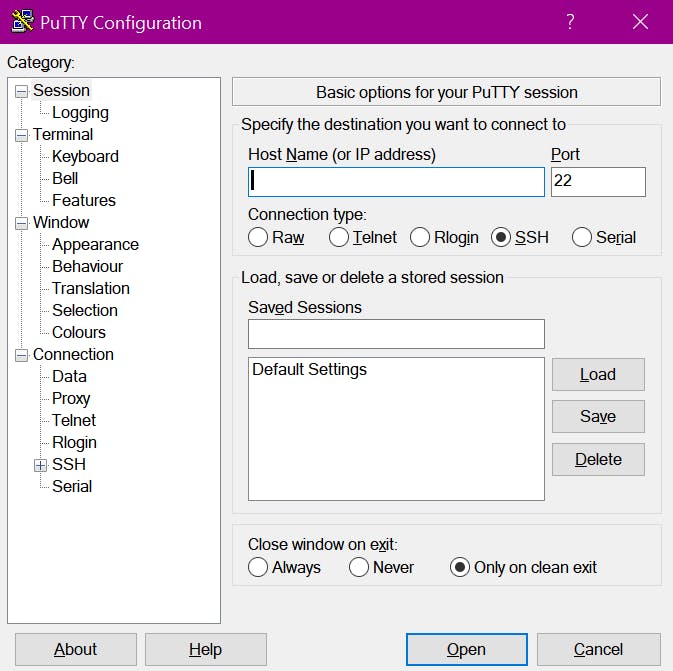
The PuTTy Steps
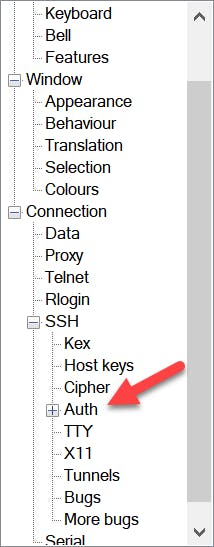
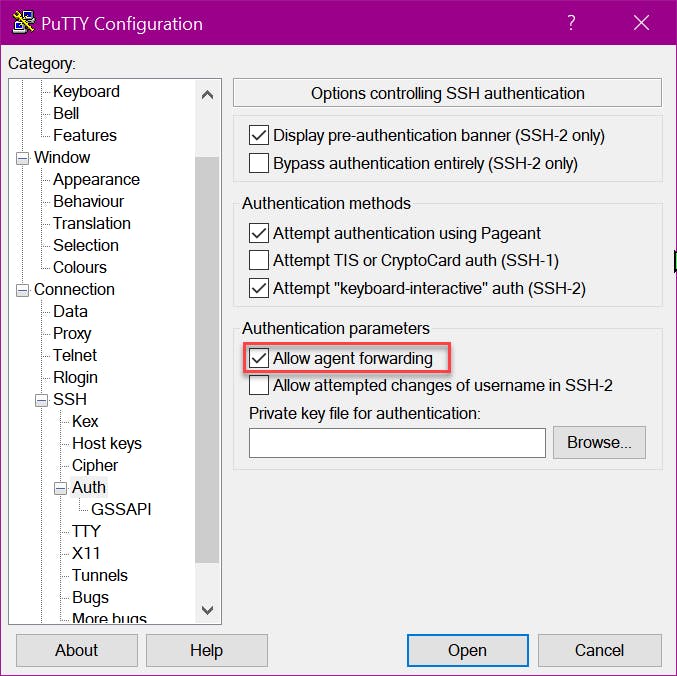
- Head to the Auth option of the left-hand side and enable forwarding
- Head back to the connection screen by clicking Connection option. Enter the IP address or website you are trying to connect to.
- Press Save to save the connection for future.
- Press Open to start the connection
The Login Steps
Once you connect to an IP, you will be presented with an option to enter a username This will vary according to your AMI instance setup. Few of the common usernames from AWS docs that you can test with are listed below.
Once you're in, you can SSH to any sandbox IP that you may have by typing "ssh IP".
Common usernames from AWS docs that you can test with:
- For Username, enter the default username for your AMI.
- For Amazon Linux 2 or the Amazon Linux AMI, the user name is ec2-user.
- For a CentOS AMI, the user name is centos.
- For a Debian AMI, the user name is admin.
- For a Fedora AMI, the user name is ec2-user or fedora.
- For a RHEL AMI, the user name is ec2-user or root.
- For a SUSE AMI, the user name is ec2-user or root.
- For an Ubuntu AMI, the user name is ubuntu.
If you get permission denied, head back out to the Auth section and ensure enable forwarding is set and saved with the session.